
After a week I finished the test interconnection between our project's C++ DLL and my WPF demo project I was required to create at work, I thought to write a post about everything I've done, first, to have a future reference, and second, to help others that face the same problem if they will have it. All the solution took me less than 3 hours (This with the creation of screenshots for this post etc). I'm ashamed to admit at this point that for this task I've spent several days trying to figure out the solution (here I added the time for solving the linking problems also, with undefined reference that can be very annoying and not obvious at all, especially if you have a big project to work with). The reasons were several:
C++ is not my strongest programming language, I do seldom something in C++
I never worked with C++ from C#
I had already a C++ DLL project that I needed to modify so that it could be loaded in C#, and it did not contain any import/export logic/interfaces
Doing a quick search on the web, I've found that people used two main approaches: C++/CLI and PInvoke. I didn't have any experience in either of them. (And as in the most of the cases, stackoverflow's community proved to be the best when it comes to answers. Just type on Google PInvoke vs C++/CLI, or just use these links directly: 1.Resource 1 2. Resource 2
After reading the answers from the links provided above, I found that PInvoke is used mainly for existing C libraries, meanwhile for C++ libraries it is preferred to create a C++/CLI wrapped. Of course, if you want to create a C interface for your interface, go ahead, but it wasn't my case though, so I've ended choosing the creation of a C++/CLI wrapper.
So, right now I will show you how this can be done.
Step 1: Creating the Native Project
When I had the requirement at work to link the C++ library with C#, I was focusing my attention to the existing C++ library. This led me to several hours of searching how can I access the native code from a dynamically linked library. If I knew, then, that visual studio (even Visual C++ 2010 Express) provides you with a wizard that creates such a project for you (Actually I found this at home when I've started writing all this), then I wouldn't have spent so much time in searching.
Just follow these steps:
Create a new project (I named it cppbusinesslogic):

In the Application Settings, make sure Application type is set to DLL, and the Additional option “Export symbols” is checked:

Now, after pressing OK, if we check what Visual Studio has created for us, we can see the following code in cppbusinesslogic.h:
|
// The following ifdef block is the standard way of creating macros which make exporting // from a DLL simpler. All files within this DLL are compiled with the CPPBUSINESSLOGIC_EXPORTS // symbol defined on the command line. This symbol should not be defined on any project // that uses this DLL. This way any other project whose source files include this file see // CPPBUSINESSLOGIC_API functions as being imported from a DLL, whereas this DLL sees symbols // defined with this macro as being exported. #ifdef CPPBUSINESSLOGIC_EXPORTS #define CPPBUSINESSLOGIC_API __declspec(dllexport) #else #define CPPBUSINESSLOGIC_API __declspec(dllimport) #endif // This class is exported from the cppbusinesslogic.dll class CPPBUSINESSLOGIC_API Ccppbusinesslogic { public: Ccppbusinesslogic(void); // TODO: add your methods here. }; extern CPPBUSINESSLOGIC_API int ncppbusinesslogic; CPPBUSINESSLOGIC_API int fncppbusinesslogic(void); |
We can see the #ifdef section, an example how to export a class, an example how to export a variable and an example how to export a function. Pretty simple, isn't it? Oh yeah, there is one more thing, if we go to C++ properties, we will see two more preprocessor definitions: _USRDLL and CPPBUSINESSLOGIC_EXPORTS. First one is for MFC, and the second one is set in order __declspec(dllexport) to be defined.

4. We will add just a simple method that will return the value 77, to make sure that our class have a return method for us to use in the example.
Remark: This a simpler example, because if you were adapting an existing C++ DLL to export, you would be required to create an export class, that would have been the interface of the DLL, because in large projects the total C++ code might be too big to export all classes, and even if not, for sure there are classes that must not be exported at all.
Step 2: Creating the C++/CLI bridge
OK, the Native test project is ready, now we need to create our C++/CLI bridge.
Add a new project to the solution (I named it cppblbridge):
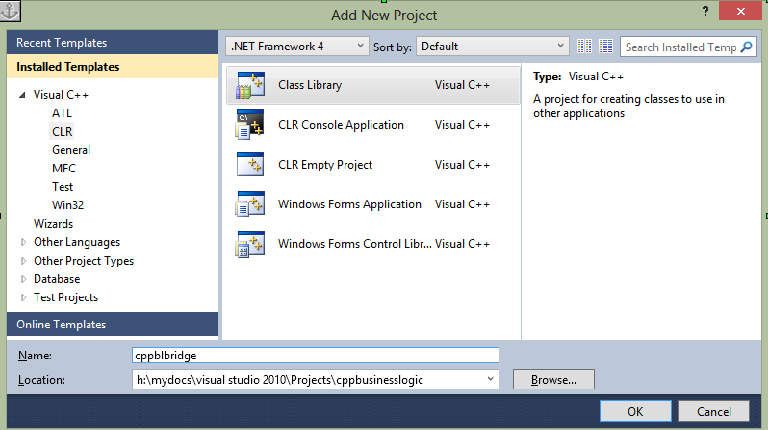
Automatically after creation the file cppblbridge.h is opened, and we see the following code:
|
// cppblbridge.h #pragma once using namespace System; namespace cppblbridge { public ref class Class1 { // TODO: Add your methods for this class here. }; } |
Before we will modify it for our purposes, we need to make sure that we reference our BL project. We can do that by opening project dependencies and checking our BL project:

And the last preparation step is to add the dependency to our BL DLL in Additional Dependencies:

Now we can modify our files to connect to the C++.
So, the header:
|
// cppblbridge.h #pragma once #include "../cppbusinesslogic/cppbusinesslogic.h" using namespace System; namespace cppblbridge { public ref class CppBLBridge { private: Ccppbusinesslogic* m_cppBL; public: CppBLBridge(); ~CppBLBridge(); int getTestValue(); }; } |
And the source file:
|
// This is the main DLL file. #include "stdafx.h" #include "cppblbridge.h" using namespace cppblbridge; CppBLBridge::CppBLBridge() { m_cppBL = new Ccppbusinesslogic(); } CppBLBridge::~CppBLBridge() { delete m_cppBL; m_cppBL = 0; } int CppBLBridge::getTestValue() { return m_cppBL->getTestValue(); } |
Note that Intellisense doesn't work at all in C++/CLI. Microsoft removed the support from Visual Studio 2010, even though in VS2008 it worked.
After we have done all this, we will be able to build our two projects. However, we need a way to see that our connection works. This we will do in the WPF that we will create in the following step.
Step 3. Creating the WPF project
Now we need to create our C# WPF project. Click on the solution and go add a new project:

In this project we will add a simple label and a button. I didn't spent much time on the design, because I don't find it useful for this post, so just drag&drop. Also, I added a button click event handler, and when it will be executed, we will get our value from C++.
Now how do we connect our WPF app to the bridge you will ask?
First of all we need to add a reference to our bridge project:

After this, I modified the MainWindow.xaml.cs file to contain the following code:
|
using System; using System.Collections.Generic; using System.Linq; using System.Text; using System.Windows; using System.Windows.Controls; using System.Windows.Data; using System.Windows.Documents; using System.Windows.Input; using System.Windows.Media; using System.Windows.Media.Imaging; using System.Windows.Navigation; using System.Windows.Shapes; using cppblbridge; namespace TestApp { /// <summary> /// Interaction logic for MainWindow.xaml /// </summary> public partial class MainWindow : Window { CppBLBridge cppBLBridge; public MainWindow() { InitializeComponent(); cppBLBridge = new CppBLBridge(); } private void button1_Click(object sender, RoutedEventArgs e) { label1.Content = cppBLBridge.getTestValue(); } } } |
Note that intellisense works like marvel in here, in comparison with the C++/CLI project.
If we try to build our project, we will succeed, BUT, if we try to start our WPF project (and don't forget to make it a startup project), we will get something like this:

This is, however, the result of the simple fact that in the output folder there is not present the business logic dll cppbusinesslogic.dll. We can copy it by hand there, but I think this is very annoying. Here we have two options:
Change the output folder of our WPF project to be the same as the one for the other two projects
Use a post-build event that will copy automatically using a .bat file the required dll.
If the point 1 is simple, I would like to show the second one.
We will create a bat file in the folder of the WPF project with the following contents:
|
@ECHO OFF SET CONFIG_PATH=%CD% CD.. CD.. CD.. SET DLLS_SOURCE_LOCATION=%CD%\Debug SET DLLS_TARGET_LOCATION=%CONFIG_PATH%
echo Dll's copy from : %DLLS_SOURCE_LOCATION% echo Dll's copy to : %DLLS_TARGET_LOCATION%
set DEBUG_DLLS_LIST=(cppbusinesslogic.dll) for %%i in %DEBUG_DLLS_LIST% do @xcopy "%DLLS_SOURCE_LOCATION%\%%i" "%DLLS_TARGET_LOCATION%" /d /y
set RELEASE_DLLS_LIST=(cppbusinesslogic.dll) for %%i in %RELEASE_DLLS_LIST% do @xcopy "%DLLS_SOURCE_LOCATION%\%%i" "%DLLS_TARGET_LOCATION%" /d /y |
This bat file will allow us to copy our cppbusinesslogic.dll to the destination folder of the WPF project.
Now, we will add the execution of this bat to the post build event actions of our WPF project.

Now, if we build our solution, everything will be automatic, and if we will run our WPF application, we will get our window started like this:

After pressing the Button, we will get:

Which is that what we needed. Everything works, the job is done!
Here is a link to GitHub: